Keycloak
KHEOPS delegates user authentication to Keycloak. With the appropriate configuration, any recent version of Keycloak can be used. There are many different ways to configure Keycloak to work with KHEOPS. This document describes the required configuration, along with informational examples for how to achieve this configuration. Make sure to create a realm before following these instructions. These instructions are not meant to be applied to the Master realm.
1. Keycloak KHEOPS Login Client
In order for the KHEOPS UI frontend to be able to initiate a login for a user it will need to use a Keycloak Client. This must be a public OAuth2.0 client with Standard flow enabled.
Example configuration
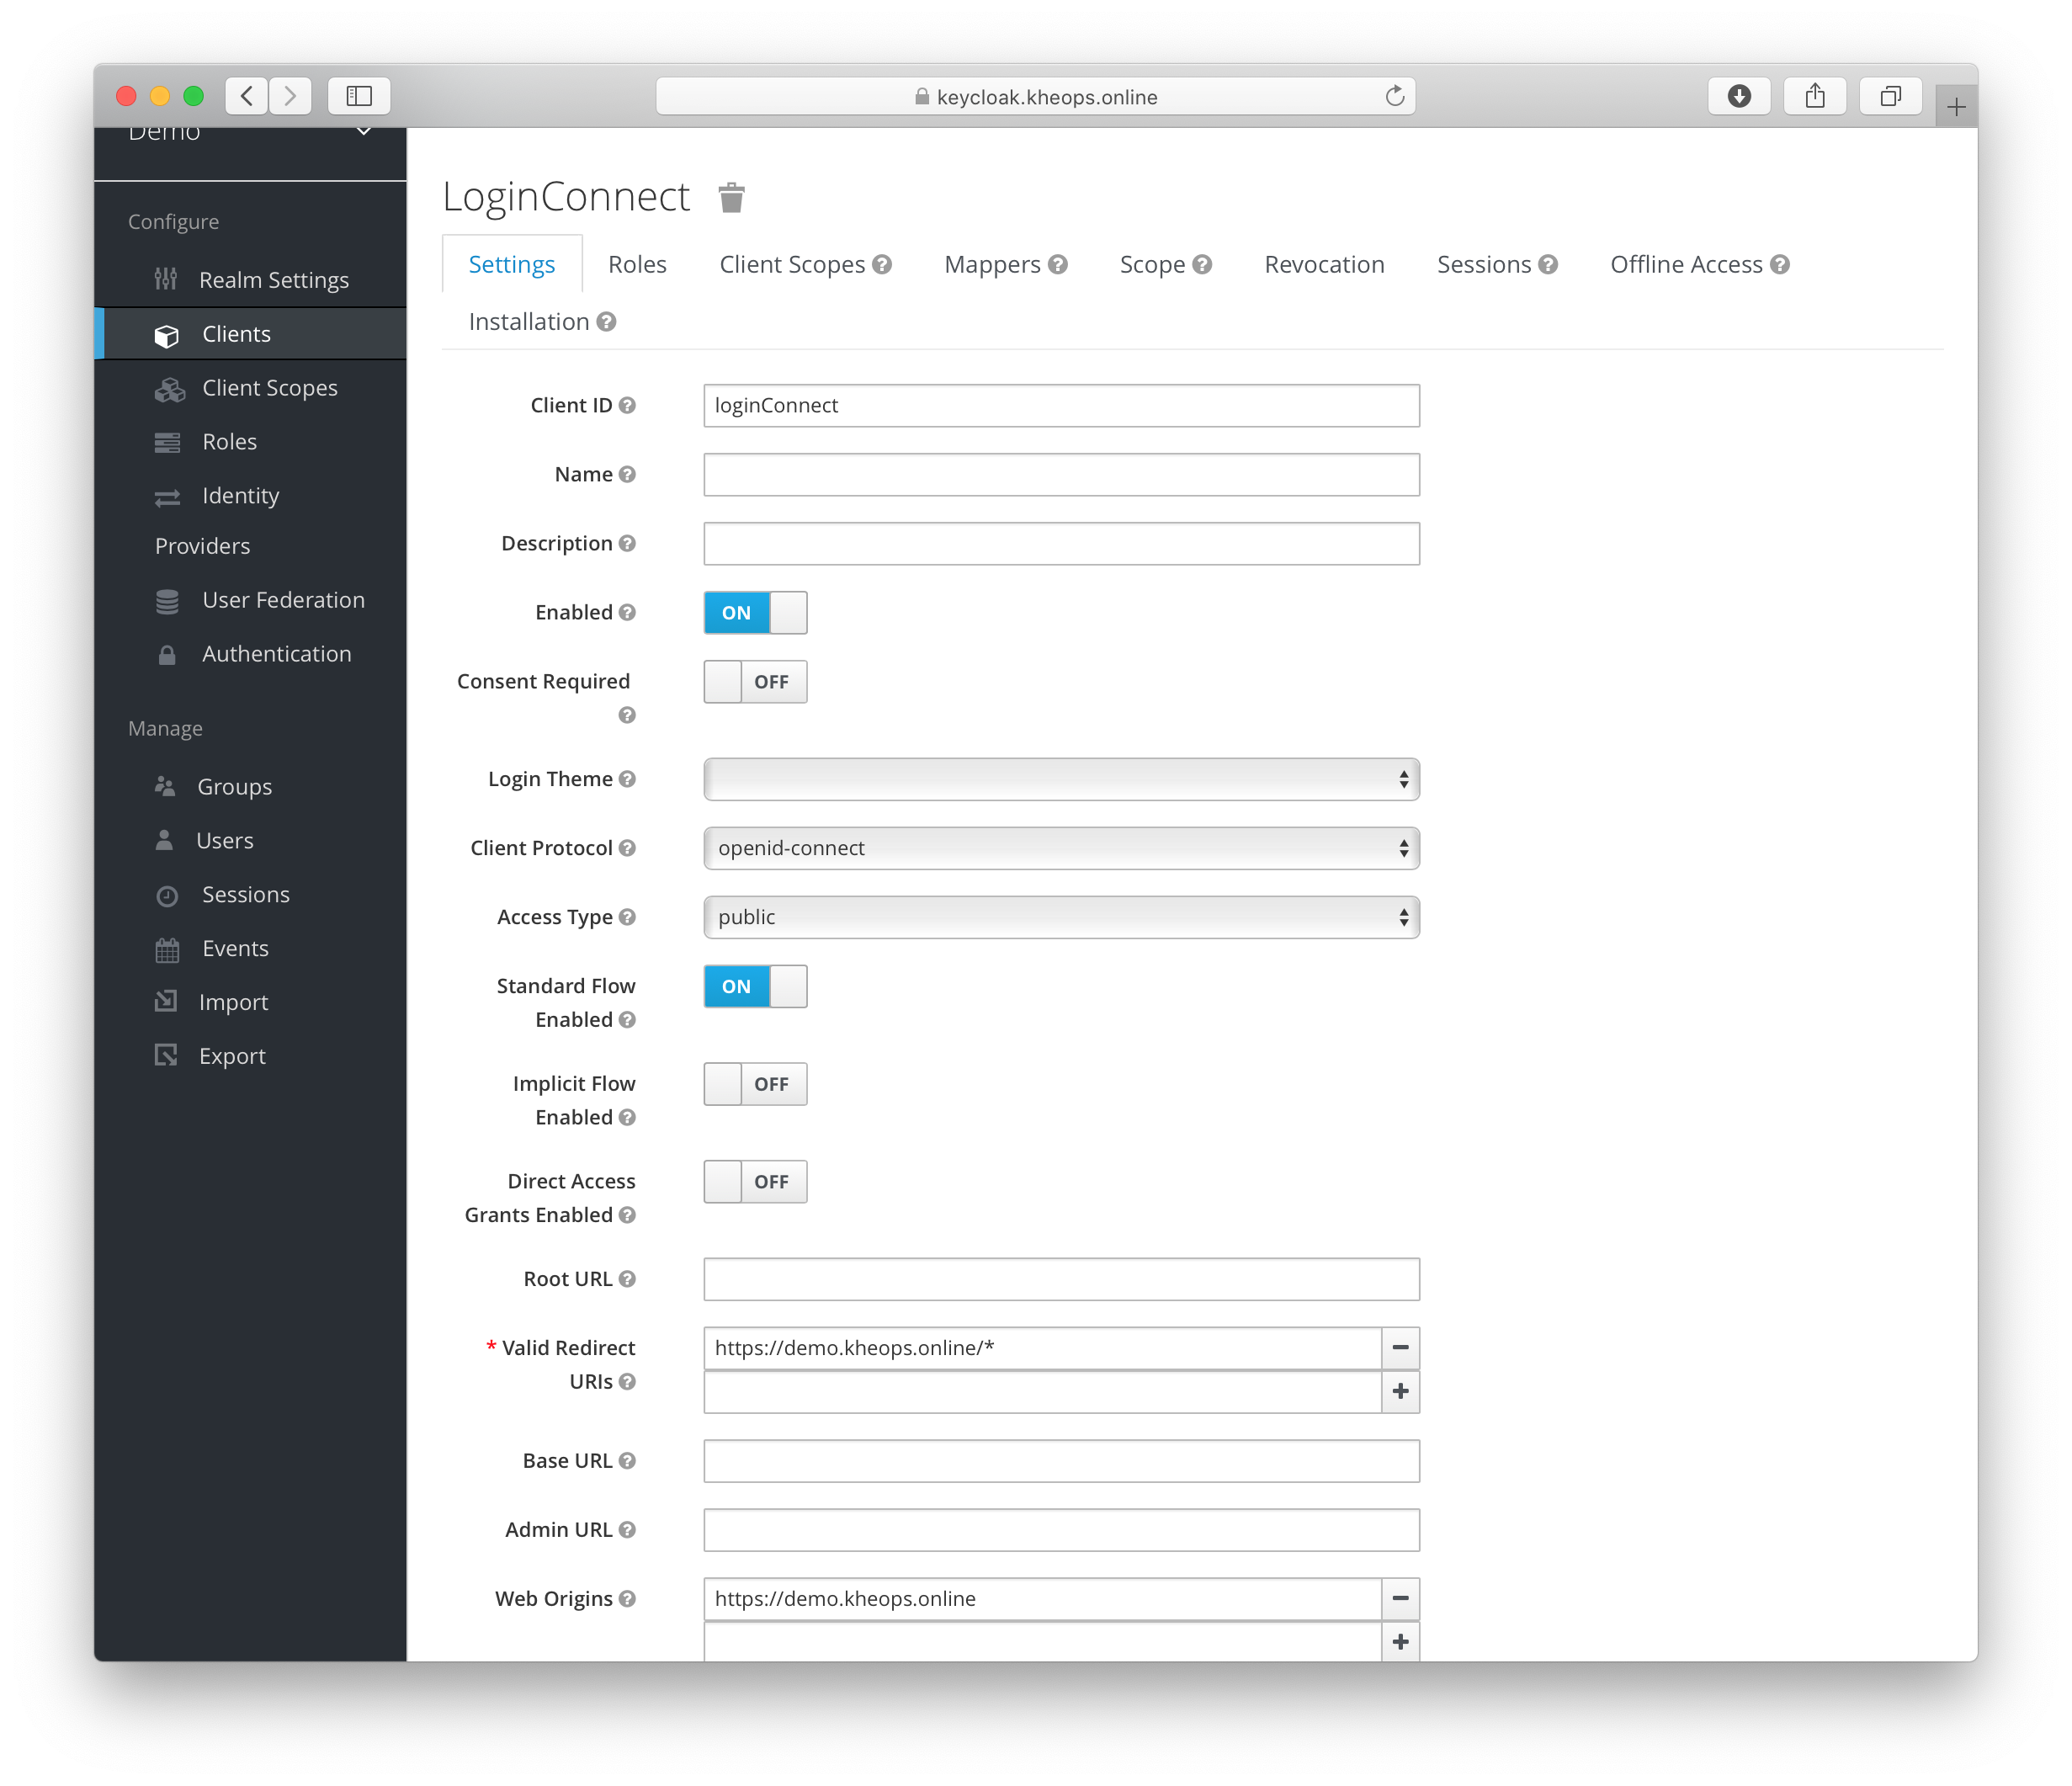
Set reasonable values for the Valid Redirect URIs and Web Origins. The wildcard * will work, but with negative security implications.
2. Client Scope (kheops)
KHEOPS will accept JWT Access Tokens issued by Keycloak that contain “kheops” within the “scope” claim.
Example for adding the “kheops” scope claim
Create a new Client Scope that includes kheops in the token scope. 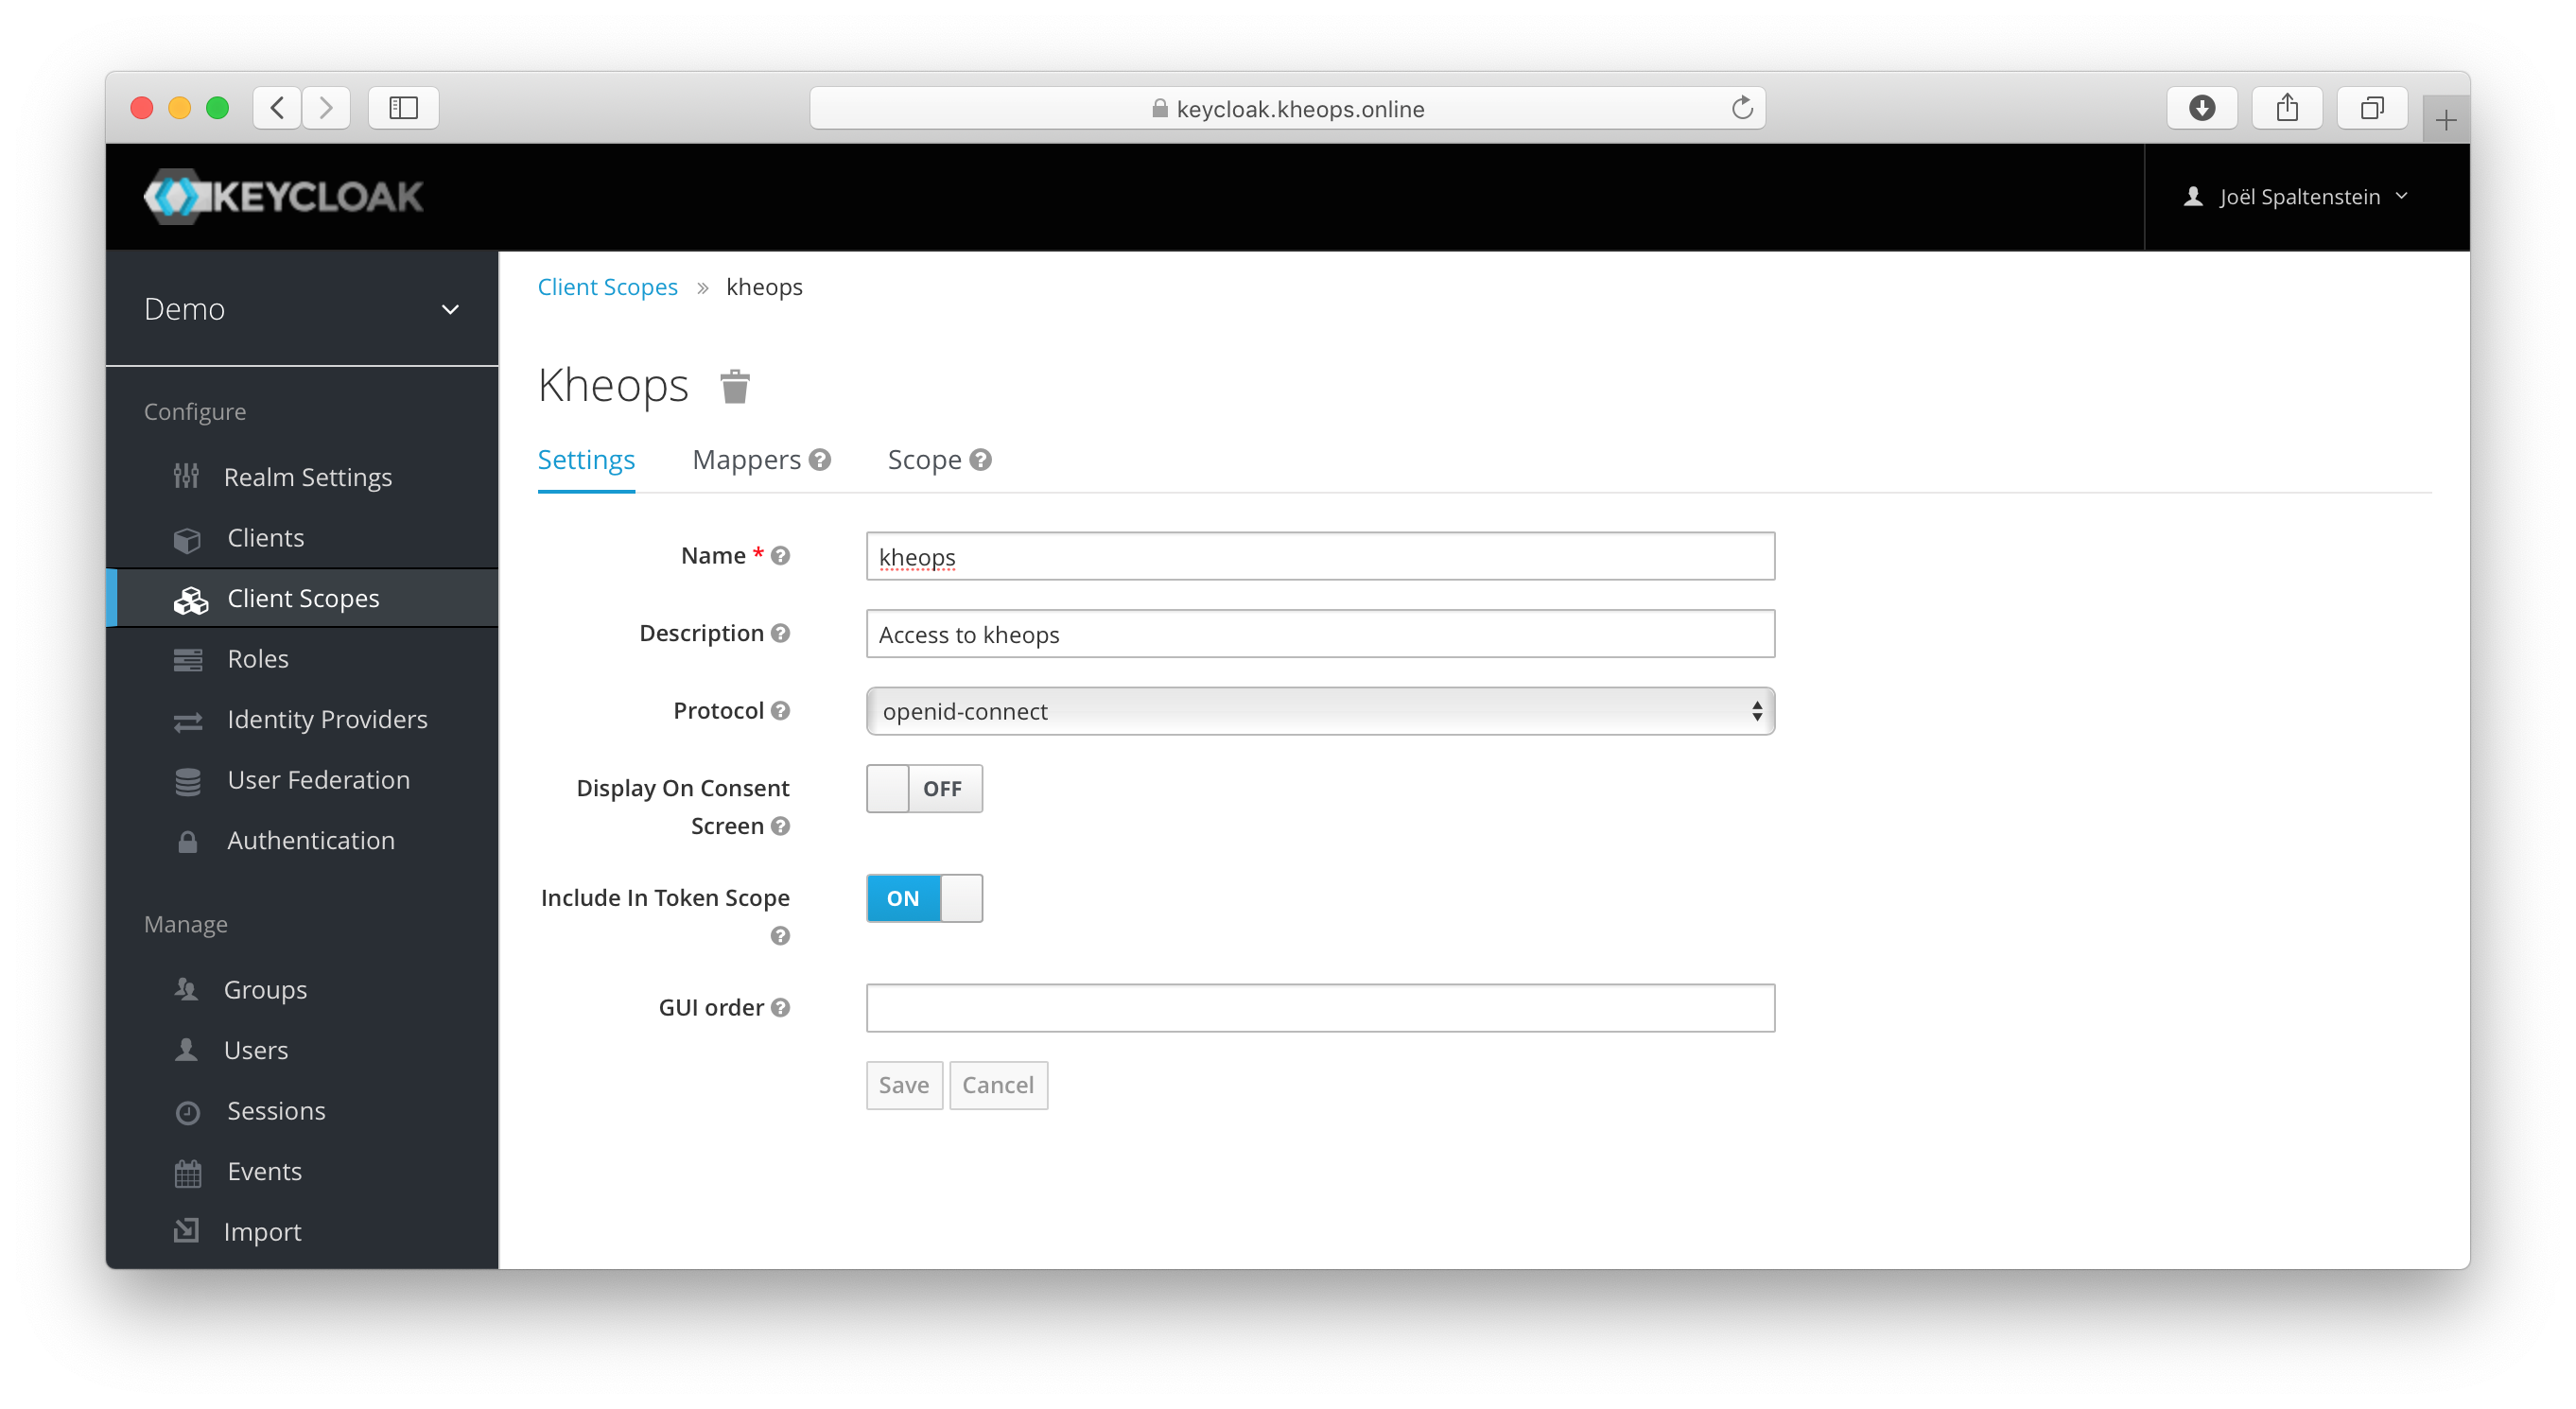
Assign the new kheops Client Scope as a default scope for the login client. 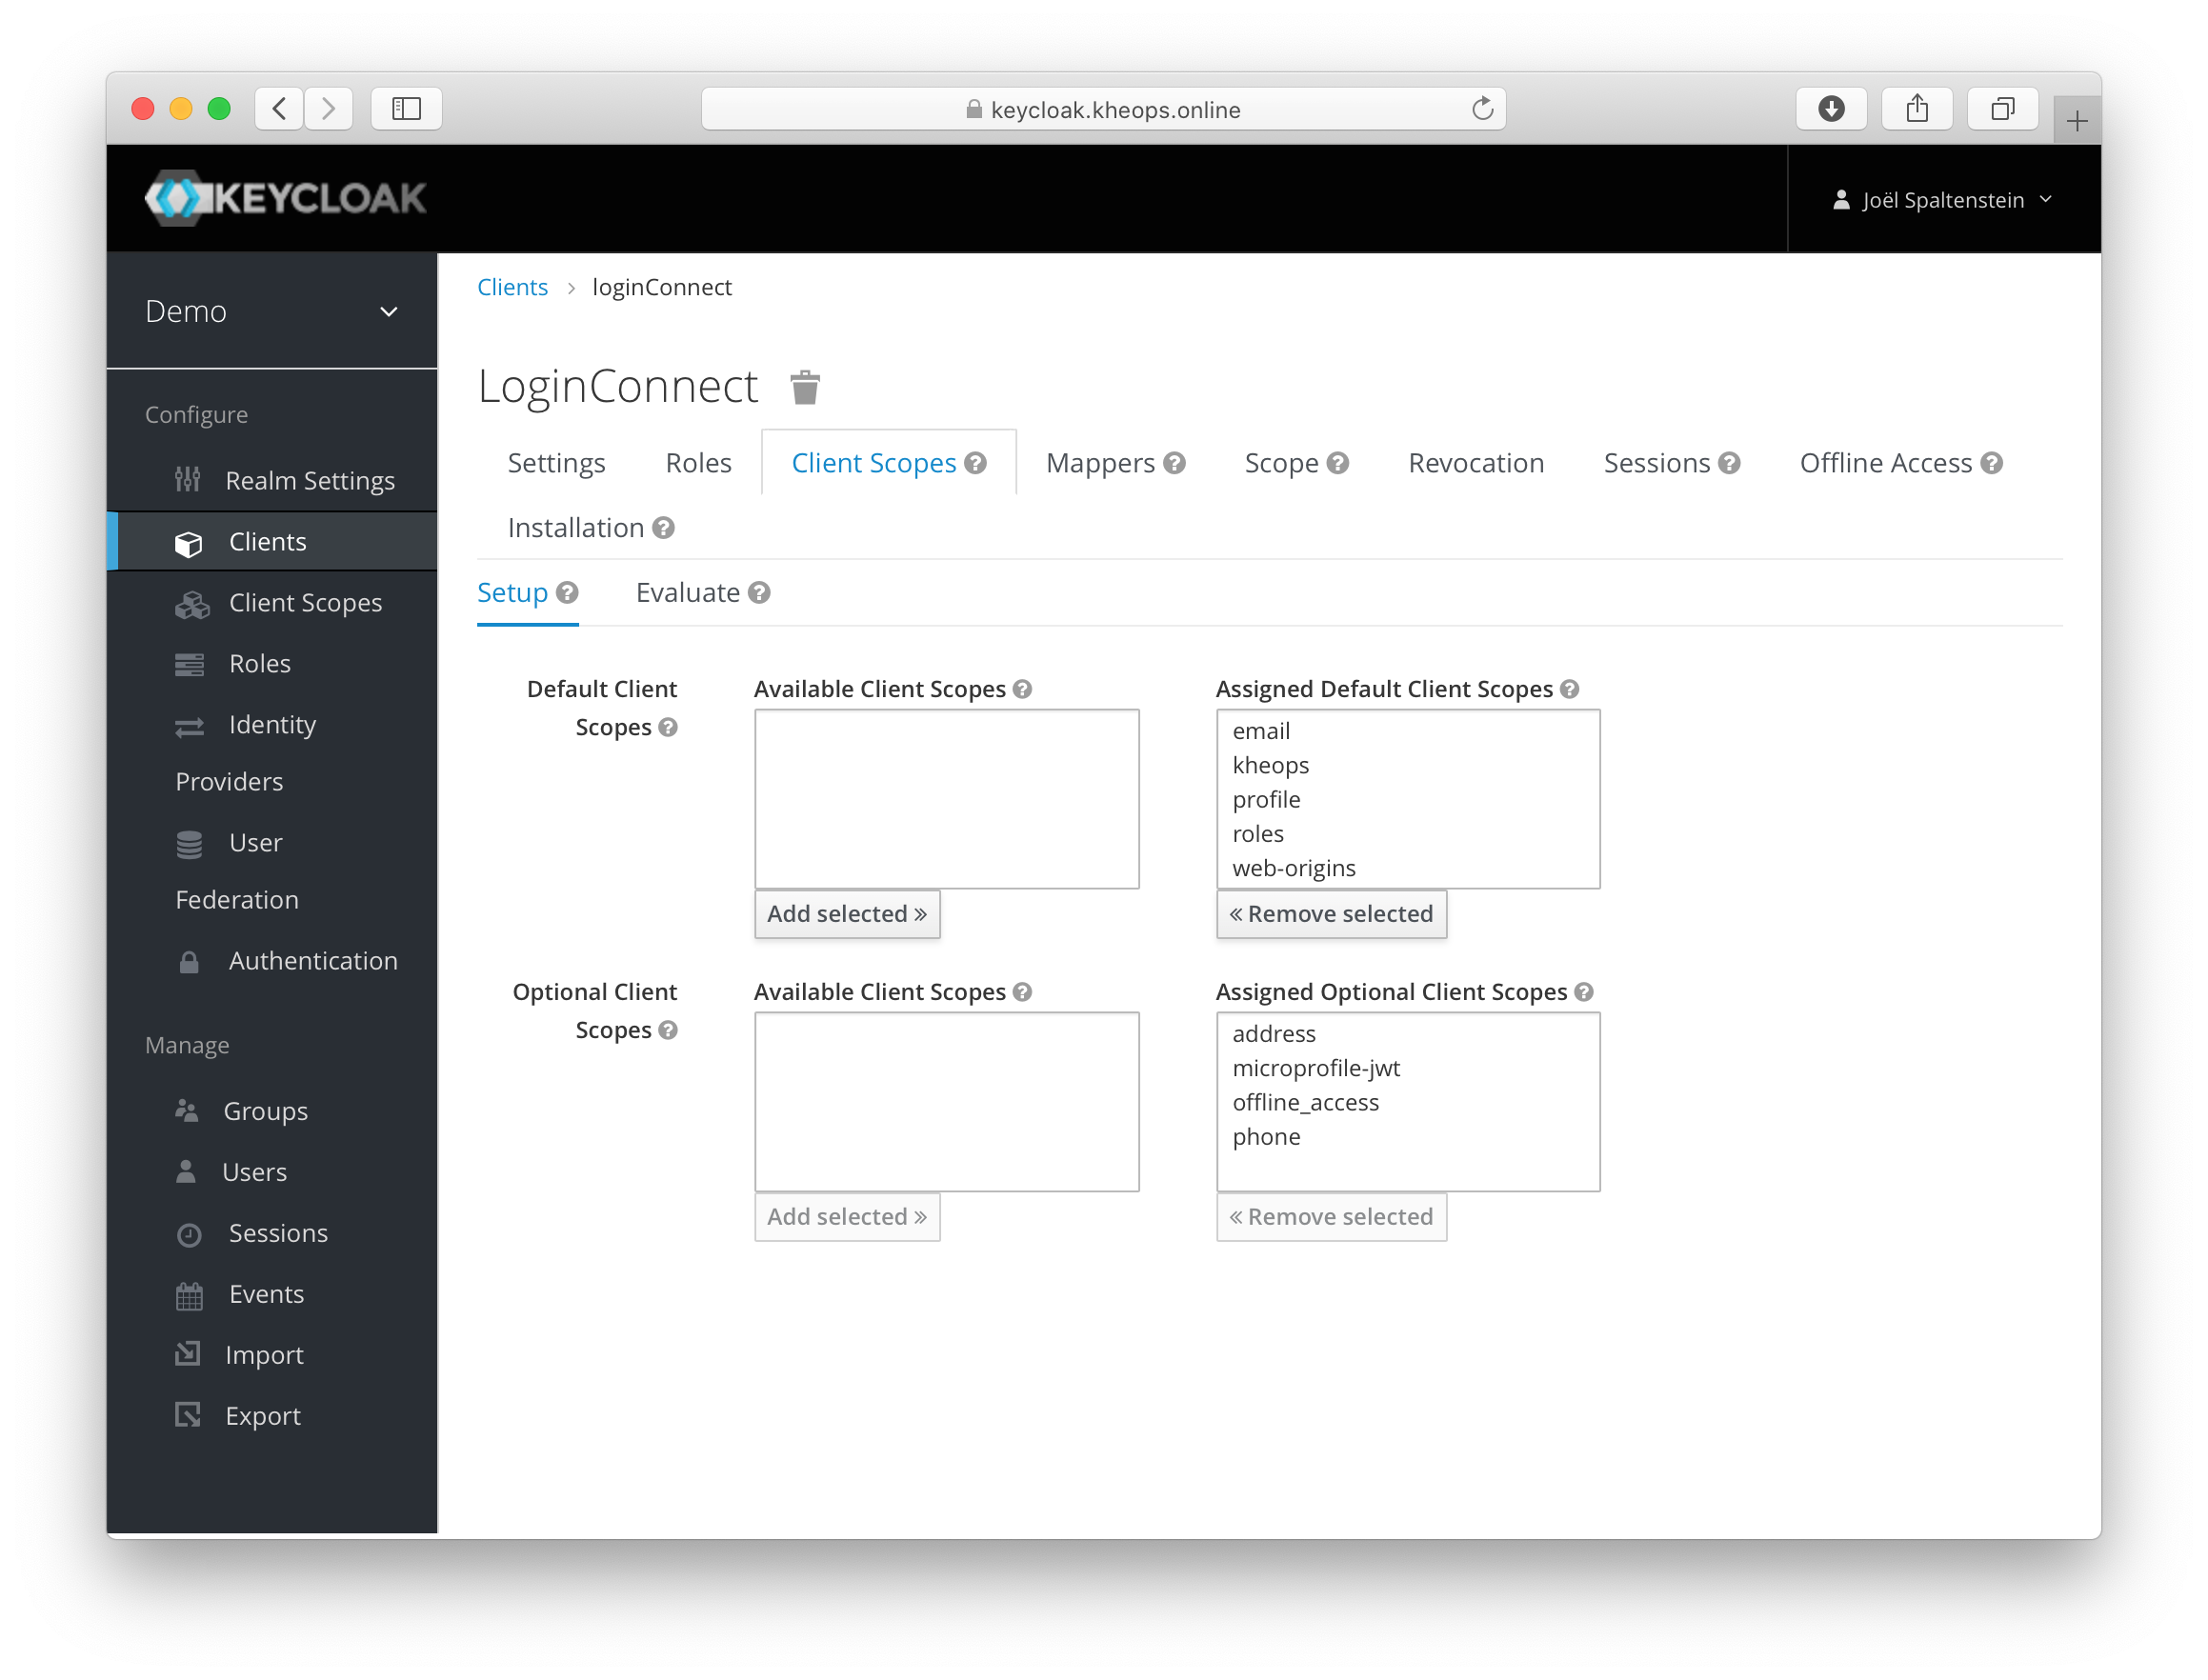
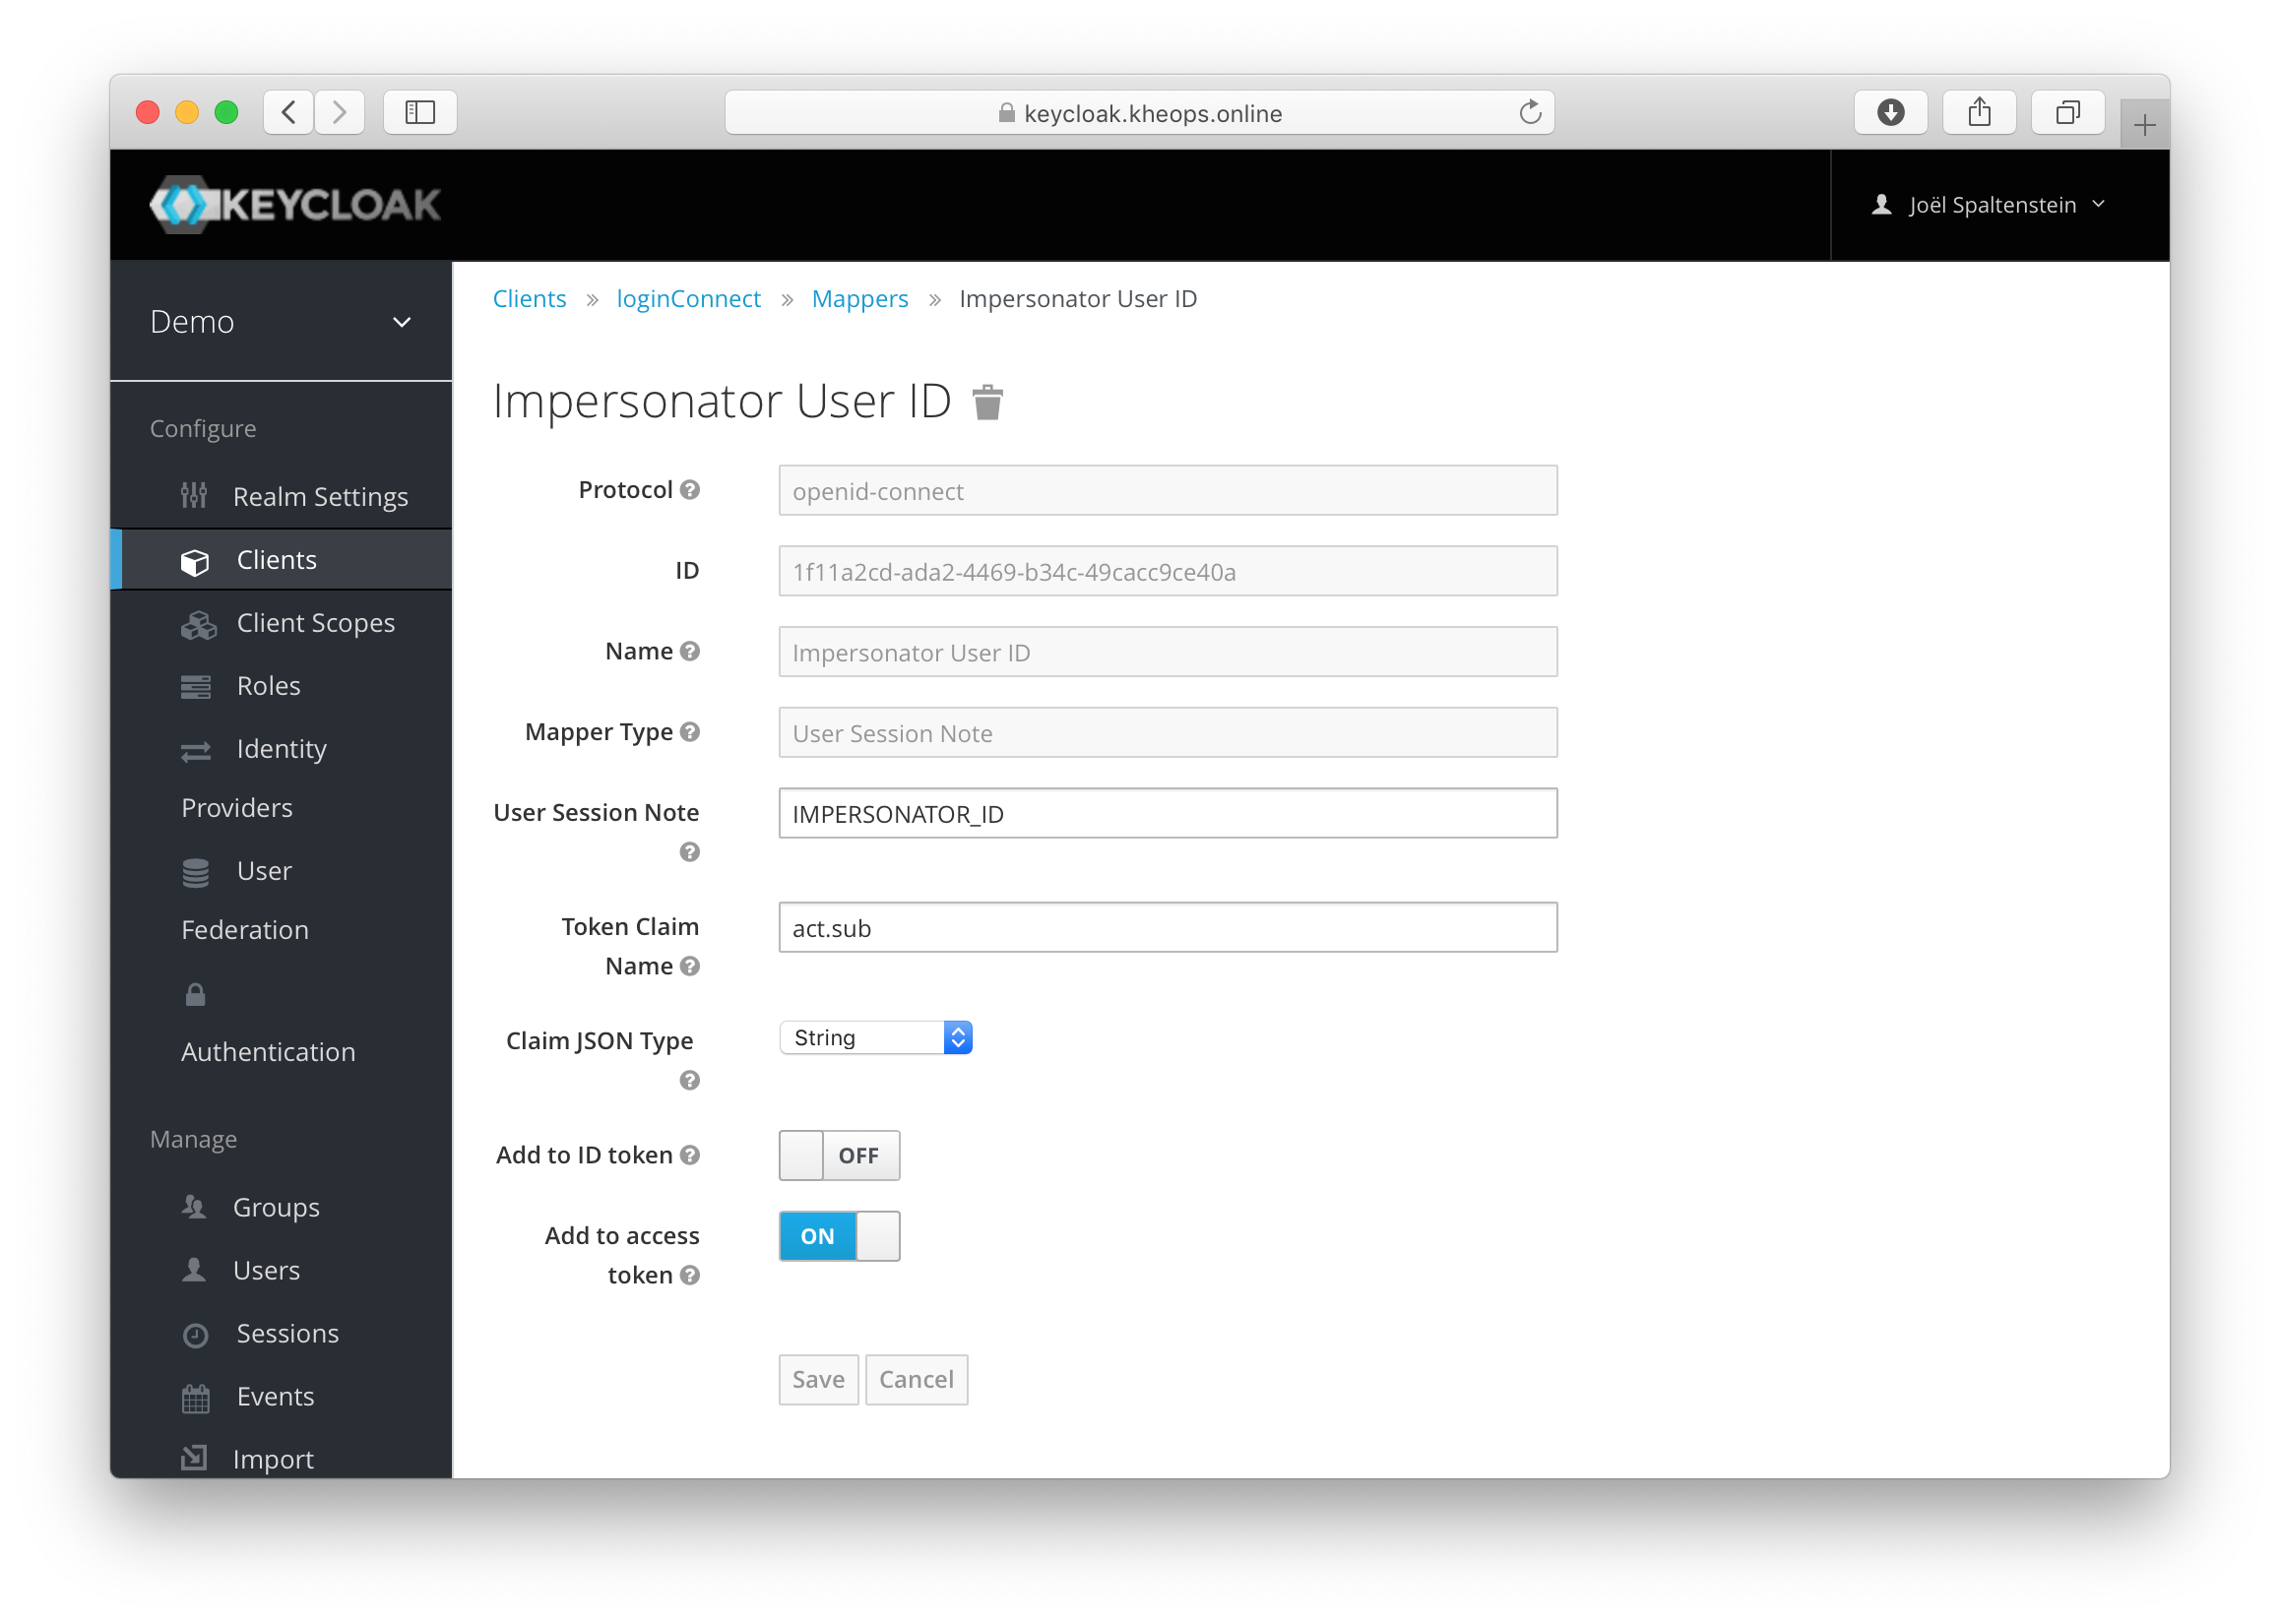
3. Logging Impersonations
In order for KHEOPS’ audit logging to keep track of actions that were executed by an administrator who has impersonated a user, KHEOPS uses the “act” claim in the Access Token, as defined in the OAuth 2.0 Token Exchange draft RFC.
Example
Under the login client’s Mappers tab, click on Add builtin. Then, add the Impersonator User ID mapper. 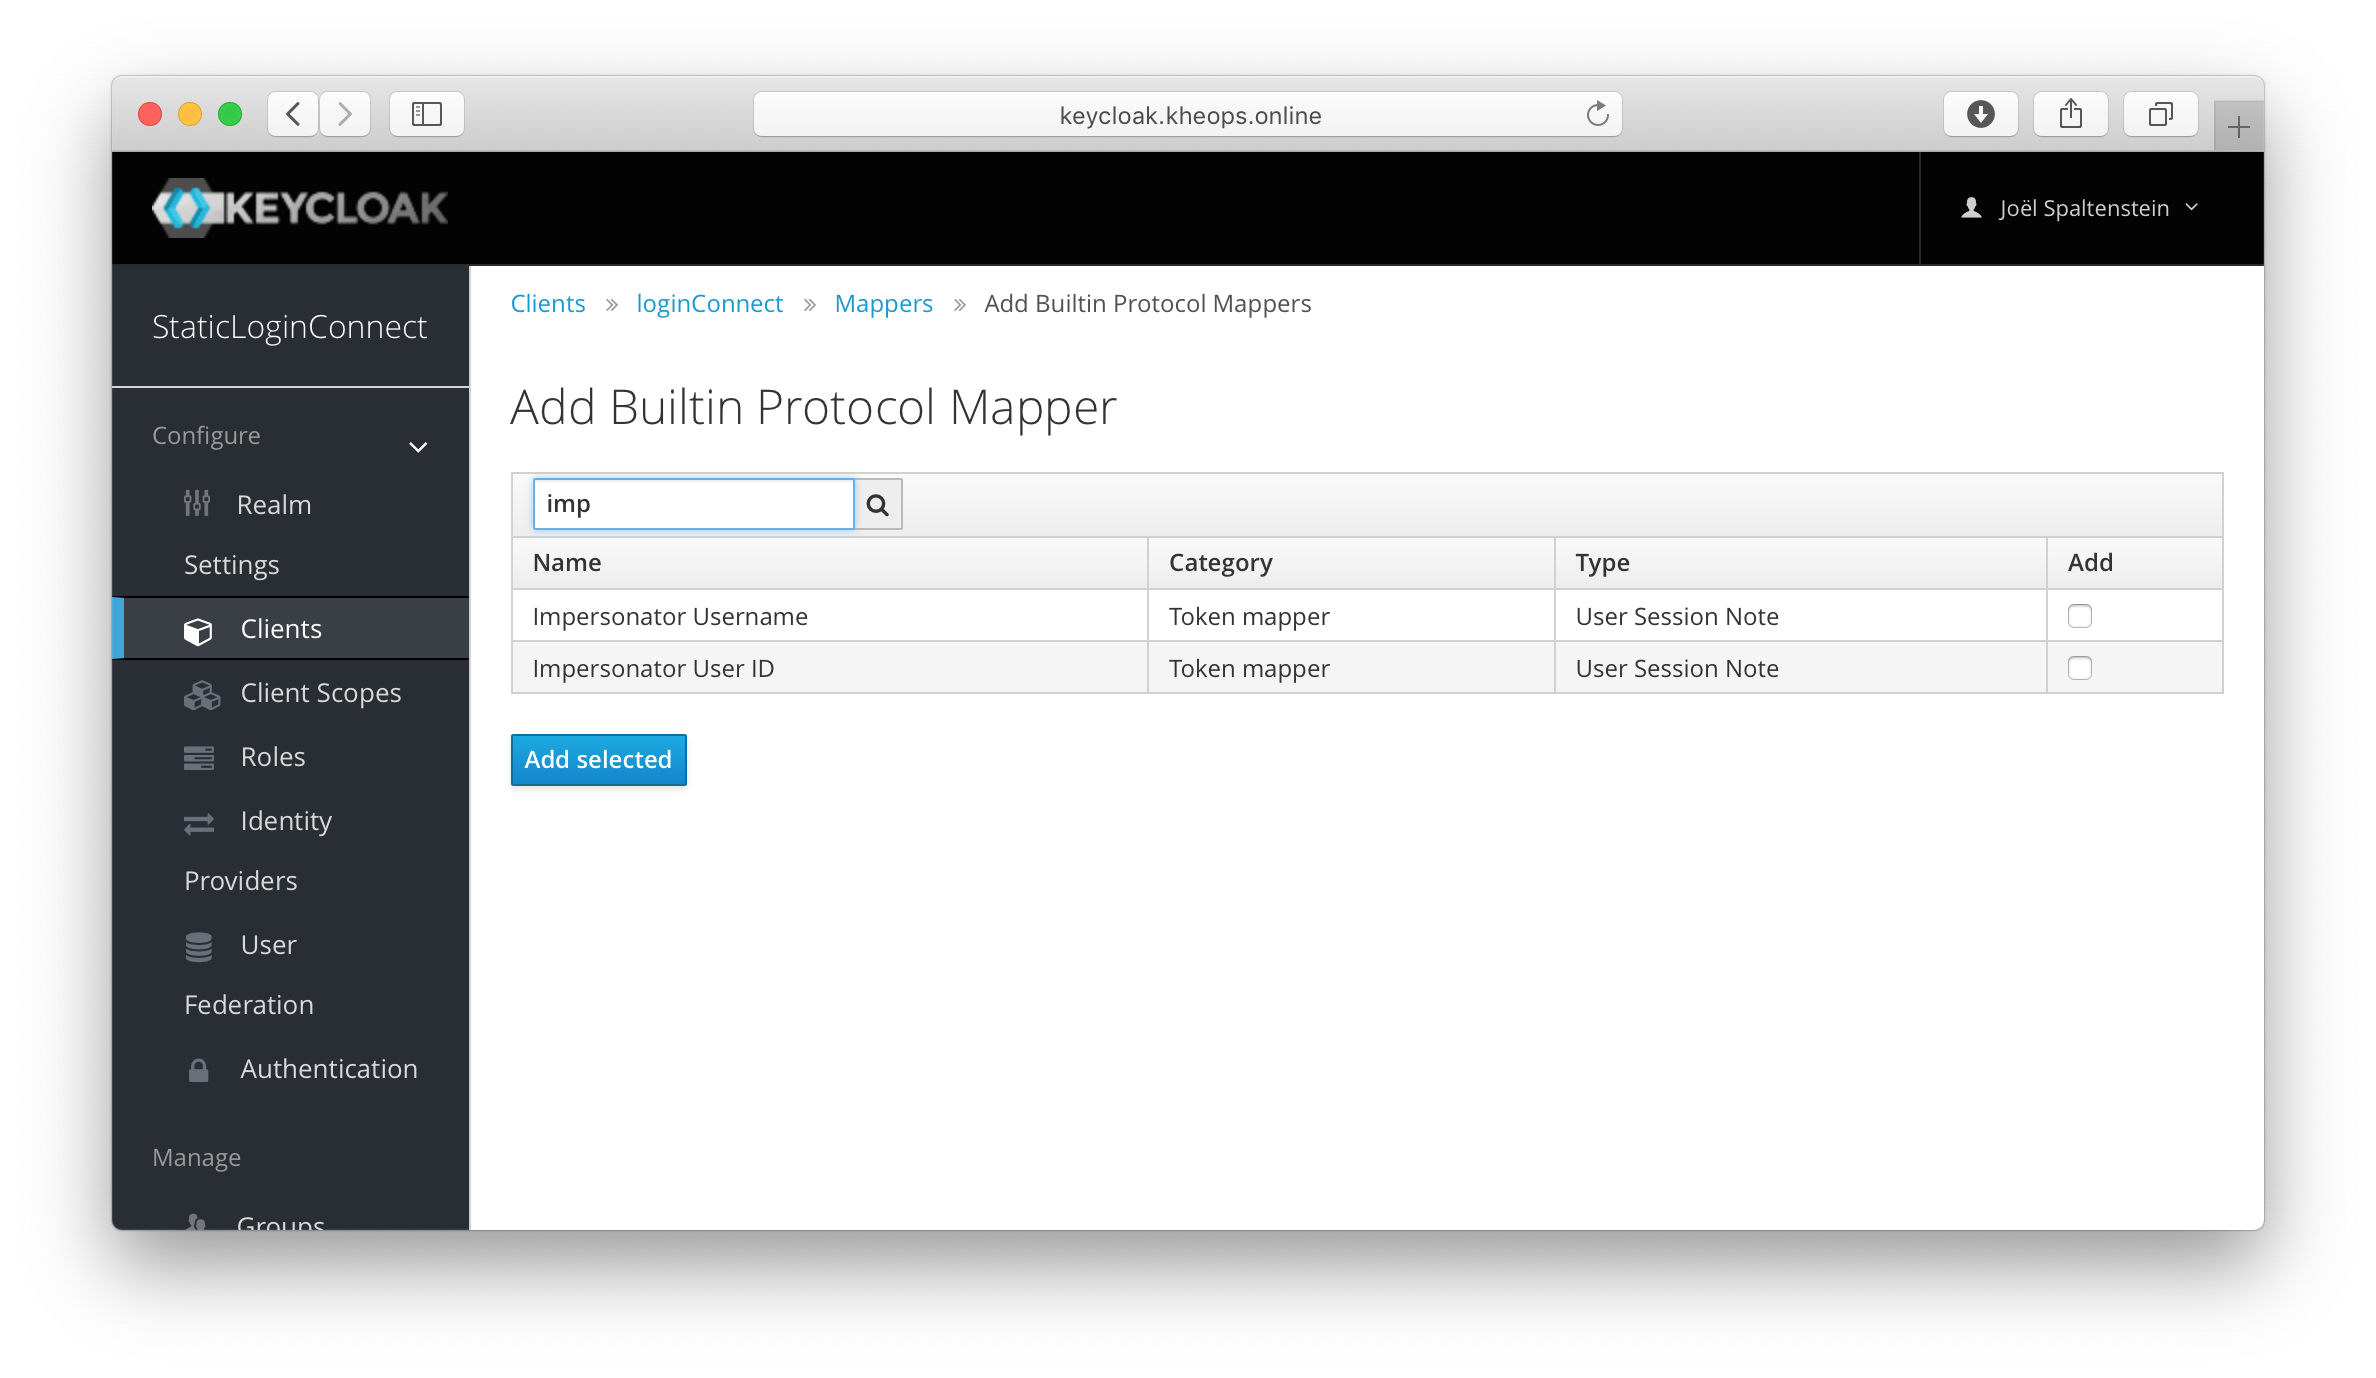
Set the Token Claim Name to act.sub. It is not necessary to have the impersonator claim be in the ID token.